
Needle Felting Kit
Needle felting is essentially sculpting with wool using special barbed needles that tangle and compress the fibers.
What You'll Need
Wool Roving (or Batting): This is the loose, unspun wool you'll be sculpting. Start with a medium-sized piece.
Felting Needles: These are very sharp and have tiny barbs that hook the wool fibers. They are fragile, so be gentle!
Felting Mat or Cushion: A foam pad or brush mat is essential. It protects your needles (and your lap/table) as you poke.
Basic Shape Cutter (Optional): Cookie cutters or stencils can help you start with a defined shape.
Step-by-Step Instructions
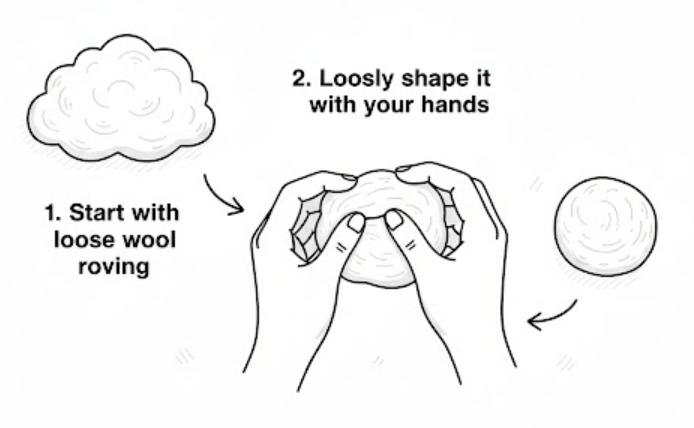
Step 1: Prep the Wool
Take the piece of wool roving you want to start with and loosely shape it into the basic form you're aiming for (a ball, a flat shape, etc.). Tip: When making a three dimensional shape, try rolling the fiber as tightly as possible. This lessens the amount of work you must do to firm up the piece at the end.
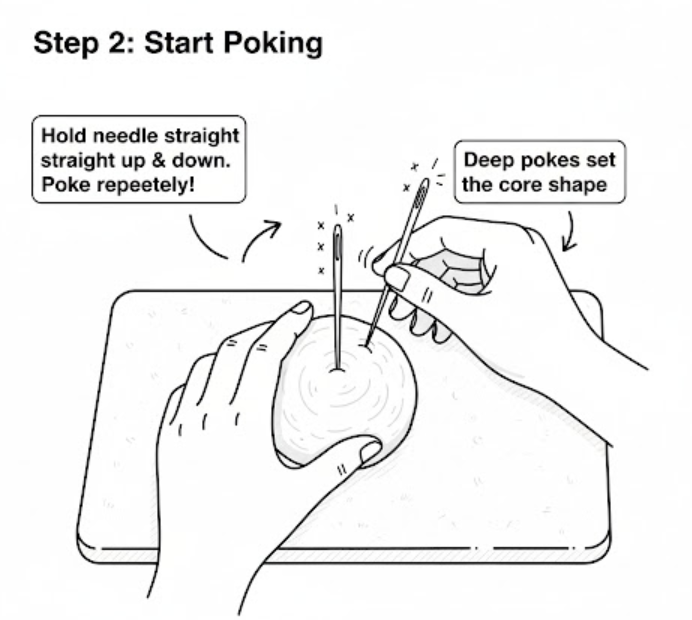
Step 2: Start Poking
Place your wool on the felting mat. Hold the needle perpendicular (straight up and down) to the wool and mat. Gently and repeatedly poke the needle in and out of the wool.
Tip: Start with pokes that go deep into the wool to set the core shape. Try not to poke into the foam pad as this might break your needle.
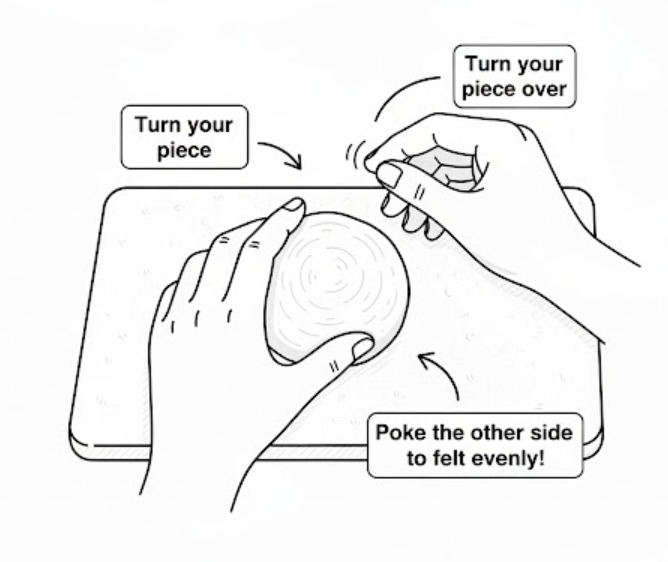
Step 3: Turn and Shape
As you poke, the wool will start to compress and shrink. After poking a section a few times, turn your piece over and poke the other side. This ensures it felts evenly. Keep turning and poking! The more you poke, the firmer and more defined the shape becomes
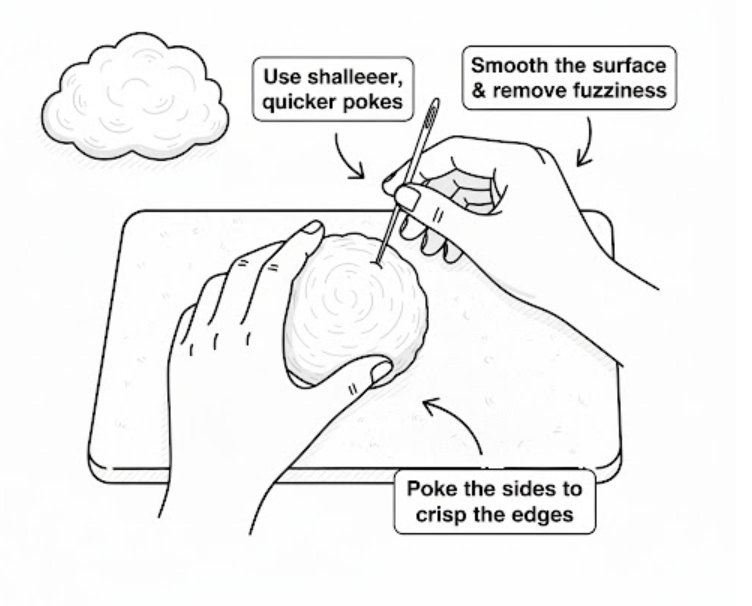
Step 4: Refine the Surface
Once the core is firm, use shallower, quicker pokes to smooth the surface and eliminate fuzziness. Concentrate on any bumps or uneven areas. If you are making a flat shape, ensure the edges are crisp by poking straight into the sides.
Step 5: Adding Details (If Applicable)
If you want to add a new color (like eyes or a nose), take a very small, wispy piece of the new wool. Place it on the spot you want the detail and use the needle to gently poke the edges of the small piece into the main piece. The barbs will lock the new fiber onto the surface.
💖 Beginner Felting Secrets
Go Slow: The biggest cause of broken needles is jamming them in at an angle, or trying to pull the wool off the needle too quickly. Always pull the needle straight out.
Start Simple: Don't try to make a detailed character right away. Start with a simple sphere (ball) or a flat coaster. This builds your muscle memory!
Be Patient: Felting takes time. If your piece is still floppy, it means you need more poking! The finished piece should feel quite firm, almost like a dense sponge.
You've got this! Just start poking and see what beautiful creations you can make.